

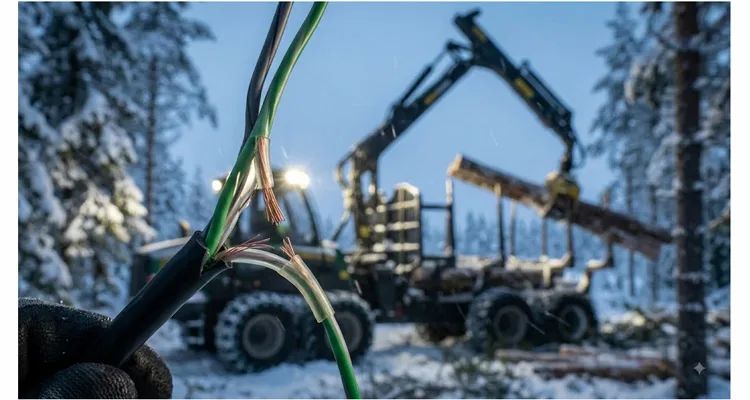
The first U-code appeared at 4:17 AM, right when the forwarder’s hydraulic oil hit 14 degrees centigrade and the cab heat started pulling moisture out of the floor mats. By the time the operator finished his third key cycle, he’d learned the pattern: boom past 47 degrees on the slew, CAN bus drops three nodes, engine stays running, restart clears it. The laptop tech who drove out Tuesday called it “clean.” He was wrong. This is not a ghost. This is a green stick fracture in a CAN bus wire, and if you’ve been chasing it for weeks, I wrote this for you.
The Moment You Realize the Wire Isn’t Broken – It’s Fractured
A green stick fracture in a wiring harness works exactly like the pediatric bone injury it’s named after: the copper conductor bends, the outside strands survive, but a core of copper cracks just enough to become a temperature- and vibration-sensitive resistor. The insulation remains intact. The wire feels normal in your hand. It passes a continuity test at rest. Under load, with the machine articulating and the harness flexing, that invisible crack opens and closes like a bad contactor. The crack flexes open, the instantaneous impedance jumps by maybe 30 ohms, and a stub of reflected energy shoots back down the twisted pair and hammers the recessive-to-dominant edge just as a node tries to assert the bus. The transceiver sees a bit that isn’t clearly dominant or recessive, flags an error, and a healthy module gets blamed for something it never sent.
I’ve pulled a seemingly healthy twisted pair out of a harvester head harness, stripped the PVC jacket inch by inch, and found a single copper conductor with a telltale necked-down zone – copper strands still wrapped around each other but individual filaments sheared internally. The outer strands carried continuity. The inner ones carried nothing. At that point, the wire wasn’t a wire. It was an intermittent phantom that only existed when the boom was at full extension and the temperature dropped below freezing.
Why Forestry Equipment Grows These Fractures Faster Than Anything Else
A wheel loader shakes on a flat concrete pad. A forwarder flexes, twists, and gets dragged through frozen slash piles while snowmelt drips into every connector. It isn’t just vibration—it’s cyclic torsion combined with a cocktail of moisture, road salt, and pine sap that etches copper. I stopped relying on service manuals and started keeping a photo log of every harness autopsy. After thirty dissections, the failures sorted themselves into a handful of repeatable fingerprints.
| Failure Signature | Root Cause | Typical Location |
| Neck-down pinch | Low-cycle copper fatigue from bend radius under 15 mm on CAN bus wiring, often under over-tightened cable ties | Harness transition points, boom pivot areas |
| Black-lace conductor | Moisture ingress through micro-cracks in CAN bus wire insulation, leading to corrosion and impedance discontinuity | Any point where insulation was cold-flowed by a clamp or tie |
| Hard-drawn snap | Solid or 7-strand copper conductor used in high-flex CAN bus zone; work-hardens and fractures at the neutral axis of a bend | Aftermarket or locally sourced replacement wire sections |
| 3-mm backshell snap | Zero strain relief at connector exit; CAN bus wire bends 90° against a steel bracket, concentrating flex at the crimp transition | Inside Deutsch or Ampseal connector boots |
The Neck-Down Pinch
Every time the boom cycles, a small section of the CAN bus wiring harness bends through a radius that the wire manufacturer never intended. Over 200,000 cycles – about five months of real production – the copper undergoes low-cycle fatigue. The strands begin to neck down, one filament at a time. I’ve measured bend radii under 15 mm on factory-routed CAN lines where the spec sheet called for a minimum static bend radius of 40 mm for that gauge. The result is almost always a crimp under a cable tie that was one click past snug, concentrating stress on a single point until the copper gives way.
The Black-Lace Conductor
I’ve cut open CAN bus harnesses where the jacket passed visual inspection but the conductor inside had turned to black lace. A cable tie that’s one click too tight cold-flows the insulation just enough to let moisture wick along the copper strands. In freeze-thaw cycles, ice widens the micro-cracks; electrolytes left behind etch the copper. The meter still reads 0.2 ohms on a CAN line at rest. That reading isn’t your problem. The problem is a 50-ohm impedance discontinuity that opens only when the corroded section bends and a crack momentarily widens.
The Hard-Drawn Snap
When I trace an intermittent CAN bus wiring fault to a section of harness built from auto parts store wire, I already know what I’ll find. I’ve seen replacement harnesses built with off-the-shelf 18 AWG solid copper because “that’s what the local auto parts store had.” CAN bus nodes tolerate a lot, but a solid conductor work-hardens and snaps cleanly in less than ten thousand boom cycles. The correct material is a 19-strand or finer tinned copper wire, ideally with an XLPE or irradiated PVC insulation that resists cold-flow. When we build forestry-grade CAN harnesses, we don’t use anything coarser than 19 × 0.15 mm stranding in moving sections. The full material chain matters too—our deep dive into J1939 cable specification explains how jacket compound, shield coverage, and impedance tolerance interact to survive or fail in a logging environment.A solid or seven-strand wire in a high-flex zone will always fracture at the neutral axis of the bend, clean as if it were cut with shears.
The 3-mm Backshell Snap
Inside a Deutsch or Ampseal connector, the sealing is perfect—right until the CAN bus wire makes that first 90-degree bend around a bracket. In forestry, the wire exits the connector body and immediately curves hard. That’s a fulcrum. Every vibration cycle flexes the copper right at the crimp transition. Within six months, you have a green stick fracture 3 mm from the pin. Open the connector, everything looks sealed; tug the wire, it feels solid. The break is hidden under the crimp insulation support, invisible until you peel the boot back and flex the wire under magnification.
Finding It When Continuity Tests Lie to You
A time-domain reflectometer might find it, but a TDR that resolves to the millimeter costs as much as a used pickup. I’ve located dozens of green stick fractures on forestry equipment CAN bus systems with tools you can build for less than fifty dollars. Here’s the process that’s worked for me across more than a dozen harvester and forwarder chassis.
Map the Fault Log, Not the Wiring Diagram
Don’t start with a schematic – start with the CAN bus fault log. Note which CAN nodes drop off the bus when the code sets. If three modules behind the cab bulkhead go silent but the engine ECU stays on, the fracture is almost certainly in the segment that flexes between the cab and the bulkhead. Circle that harness branch physically. I want my hands on the exact section of harness that moves when the boom reaches the angle stored in the fault freeze-frame.
The 10-Ohm Trick I Keep Soldered Into a Small ABS Box
I keep a small ABS box with a 10-ohm power resistor soldered to a pair of banana jacks. This CAN bus diagnostic trick has found more intermittent CAN faults than any laptop. With the machine shut down and the CAN connector unplugged at both ends, I shunt the resistor in series with the suspect wire, feed 5 volts through it, and put a millivolt meter across the resistor. Then I bend the harness by hand – inch by inch, curve by curve – essentially turning a passive wiggle test into a quantitative loaded-voltage measurement. A stable 76 mV that jumps to 210 mV when I push on a clamp 14 inches from the bulkhead tells me exactly where a strand bundle is letting go. It’s crude, it cost maybe six dollars, and it catches breaks that a continuity beep will always miss. For a clean, non-invasive connection to the bus during this test, a J1939 9-pin pigtail breakout cable lets you tap CAN_H and CAN_L right at the connector without stripping any harness jacket.
Thermal Provocation for Moisture Ingress Bridges
Moisture inside a CAN bus wiring harness behaves like a temperature-sensitive switch. A gentle application of a heat gun (not a torch – you’re not roasting the jacket) can evaporate moisture inside a micro-crack, temporarily “healing” the connection. If warming a 6-inch zone makes the resistance reading stabilize, you’ve found both the location and the moisture-entry point. This is especially telling in machines that fault only during cold-soak starts. I’ve used this method on forwarders that would lose communication for exactly the first seven minutes of operation until cab heat drove the moisture out.
Confirming the Glitch on a Scope
On a scope, a healthy CAN bus signal at 250 kbps should show a clean recessive-to-dominant transition with less than a 5% perturbation. A green stick fracture introduces a clear impedance glitch – a tiny reflection that rides back from the crack and distorts the waveform edge. I’ve captured reflections as short as 40 nanoseconds on a 1 GHz scope that corresponded perfectly to the physical location of a cracked strand bundle. Once you see that glitch dance in sync with your hand flexing the harness, you know you’re within millimeters. If you want a deeper dive into interpreting these waveform signatures, our guide on reading J1939 waveforms like a pro walks through edge timing, reflection patterns, and common-mode artifacts in detail.
Expose the Break Before You Splice
Don’t splice until you’ve visually confirmed the fracture. I slit the jacket axially with a thermal stripper so I don’t nick the strands underneath. When you see copper strands in a CAN bus wire that separate like dry grass, you’ve found it. At that point, cut back until you hit solid, bright copper in every strand.
Five Mistakes That Keep This Intermittent CAN Fault Cycle Going
- Clearing fault codes and waiting for the machine to “fix itself.”
Intermittent CAN faults are not software anomalies. Every time the bus glitches, the error counters increment. I once tracked a forwarder in northern Minnesota that had its codes cleared seventeen times over three weeks. The operator kept a tally on the sun visor. By the time the bus finally went silent for good, the machine was in a cutblock thirty kilometers from pavement, and the tow bill alone exceeded the cost of a proper harness inspection. Masking the symptom just buys time until the fracture grows enough to cause a permanent bus-off event in a critical node. This exact pattern—where a harness defect only surfaces inside a narrow RPM band—isn’t unique to forwarders. We’ve mapped the same vibration-triggered failure mechanism across excavators and chippers; see our field guide on intermittent J1939 faults at 1800 RPM for the full diagnostic sequence. - Replacing ECUs or display modules without interrogating the wire first.
Before you condemn an ECU, put a dynamic resistance test on that CAN bus harness. I watched a customer in northern Sweden swap out an I/O controller that cost four thousand five hundred dollars, only to have the same J1939 communication fault reappear 45 minutes into the next shift. The new unit’s tighter error detection made the fault surface faster. The crack? A fractured CAN return line 7 cm from the boom bulkhead connector. The old controller was never the problem. Always interrogate the harness before the black box. - Soldering a CAN bus wiring repair in a high-flex zone.
Solder doesn’t just join two wires—it climbs up the copper strands and turns flexible wire into a stiff, brittle stick. I’ve cut open a soldered repair on a boom harness that looked pristine from the outside. Under the heat shrink, the solder had wicked 12 mm up the strands, and the break had migrated exactly 3 mm past the fillet – like a fatigue crack in a welded bracket. The only acceptable field repair for a moving harness section is an uninsulated butt crimp with dual-wall adhesive heat-shrink, and even that must be mechanically supported by an over-sleeve that bridges both sides of the repair. - Using PVC electrical tape or liquid tape as a permanent insulation repair.
In a logging machine, a wrap of PVC tape is a temporary bandage that moisture and vibration tear off within weeks. I pulled a taped splice off a forwarder harness after one winter. The tape had turned into a sticky gel, and the copper underneath was black for 40 mm in both directions. A proper repair seal is an adhesive-lined heat-shrink tube that extends at least 20 mm past the break on each side, with the entire repaired section then enclosed in split-loom or braided sleeving. - Routing the repaired CAN bus wire with the same bend radius that caused the fracture.
Repeat the same routing, and you repeat the same failure on a countdown timer. When a contractor replaced a fractured CAN line on a harvester head using the same P-clip positions, the new wire failed in 11 weeks. We added a 60 mm service loop and moved the anchor point – three seasons later, it’s still clean. Anchor the harness on both sides of the moving joint so the wire experiences strain distributed over a longer section, never a single point.
For a broader collection of field-validated repair techniques that stop these fractures from coming back, see our guide on forestry J1939 harness field repairs.
How to Know the Harness Repair Actually Held
A static continuity test on a CAN bus wiring repair proves nothing. The machine needs to run loaded, through its full range of motion, across a temperature swing that replicates the fault condition. My personal standard for signing off a green stick fracture repair:
- Operate the hydraulic functions through 50 full cycles while logging CAN bus error frames. Zero error frames is the pass criterion – not “low,” not “acceptable,” zero.
- Perform a 20-minute high-idle vibration soak with the machine parked on rough ground, again logging error frames.
- Using an insulation resistance tester at 250 V DC, confirm >100 MΩ between the repaired conductor and adjacent pins after the repair has cooled to ambient. Any drop below 50 MΩ after thermal cycling indicates a microscopic moisture path that will grow.
If all three pass, the repair stands. If any test shows even a single recessive-bit error, open it back up. The fracture isn’t fully eliminated.
Building a Custom CAN Harness That Doesn’t Grow Green Stick Fractures
Prevention starts on the drafting table, not in the service bay. The mechanical and material rules below are distilled from years of dissecting failed harnesses and are complemented by our broader look at forestry J1939 harness protection strategies.
Material Selection for Moving Sections
- High-flex, fine-stranded tinned copper only in any section that moves. 19 strands minimum; 26 or 41 strands for extreme cycled zones.
- Irradiated cross-linked polyethylene (XLPE) insulation instead of PVC where cold-flex and abrasion resistance matters. XLPE doesn’t cold-flow under cable ties the way PVC does.
Mechanical Routing Rules
- Strain-relief loops at every connector egress – not zip ties cinched hard against the backshell, but a formed wire path that locks the bend radius physically before the wire enters the contact.
- Abrasion-resistant braided sleeving over any branch that contacts a steel edge, with the sleeving anchored independently from the wires so chafing doesn’t transfer.
Quality Testing Beyond the Bench
- 100% electrical testing that includes a dynamic flex test with continuous continuity monitoring, not just a static pin-to-pin test.
Our wiring harness factory has been building CAN bus harnesses under these rules for over two decades. We’re certified to ISO 9001, ISO 14001, and IATF 16949, with in-house RoHS, REACH, and UL compliance, and every harness passes through a four-stage quality gate before it leaves the climate-controlled floor. We know forestry doesn’t forgive shortcuts, so we test at extremes that match the real logging environment – not just a bench at 23°C.
Related Forestry CAN Bus Wiring Solutions You Might Look At
If you’re dealing with recurring CAN faults that no amount of field splicing seems to cure, it may be time to look at the harness as a system, not a set of individual wires. We build custom CAN bus harnesses for mixed fleets – J1939 backbone harnesses, sensor sub-harnesses, cab-to-boom transition assemblies – all designed to the specific motion profile of the machine. We also manufacture diagnostic breakout cables that let you inject test signals and monitor CAN traffic without back-probing connectors in a wet forest.
When a green stick fracture keeps returning, the real fix is almost never a single splice. It’s a re-engineered section of harness that respects the physics of the machine.
Frequently Asked Questions
1. What exactly is a green stick fracture in a CAN bus wire?
It’s a partial break of the copper conductor inside an otherwise intact CAN bus wire insulation jacket. Some strands are completely severed, others remain connected, creating an intermittent resistance that changes with motion and temperature.
2. Can a standard multimeter catch a green stick fracture in a CAN bus wiring harness?
I’ve put a calibrated Fluke 87V on a fractured 20 AWG CAN line and measured 0.2 ohms with the harness at rest. The same wire, bent 15° at the fatigue point, intermittently jumps above 80 ohms. A multimeter in continuity mode never sees it because the break closes before the meter’s sample rate can catch it. A dynamic resistance test under controlled flex, or a live CAN waveform analysis, is required.
3. Why does this problem show up so often in forestry equipment?
Forestry machines endure extreme vibration, high cycle counts on boom and head functions, moisture ingress, and frequent thermal swings. These conditions accelerate copper fatigue and corrosion, turning a wiring nuance into a dominant failure mode.
4. Is a green stick fracture the same as a “cold solder joint”?
No. A cold solder joint is a manufacturing defect at a connection point. A green stick fracture occurs along the length of the wire conductor due to mechanical fatigue, not at a solder interface. However, soldering a repair in a flex zone can create a new fracture point.
5. How can I tell if a green stick fracture is in CAN_H or CAN_L?
The fault symptoms typically appear on both lines if they’re in the same twisted pair, but a single-line fracture will skew the differential signal. An oscilloscope will show the recessive-to-dominant edges disturbed on only the affected line. Test each conductor individually under flex.
6. Does dielectric grease inside the connector help prevent a green stick fracture?
Dielectric grease prevents pin fretting and moisture wicking at the contact interface. It does zero for a copper crack 20 millimeters inside the CAN bus wire insulation. I’ve pulled connectors full of clean grease off harnesses that still failed a dynamic resistance test. Grease the contacts, but don’t mistake that for fatigue protection.
7. Should I replace the entire CAN bus harness if I find one green stick fracture?
Not necessarily, but you should inspect all conductors that share the same flex path and environmental exposure. If you find one, there’s a high probability that adjacent wires have similar fatigue damage at a different stage.
8. Can I use a time-domain reflectometer (TDR) to locate the crack in CAN bus wiring?
A high-resolution TDR can show an impedance anomaly at the crack location, especially if the crack is partially open at the time of measurement. However, a TDR often misses a fully closed crack, so a dynamic resistance method is more reliable.
9. What’s the minimum gauge wire I should use for a CAN backbone in a forestry application?
For J1939 backbones under 40 meters, 22 AWG is typical, but in moving sections we upgrade to 20 AWG with fine stranding solely for mechanical robustness, not for current capacity.
10. We’re an OEM looking to eliminate this problem in our next machine generation – can you help at the design stage?
Absolutely. We work with engineering teams to evaluate harness routing, flex points, and material specifications before the first prototype. Contact us directly for a no-obligation engineering discussion. WhatsApp or reach out through our contact page.
When the logging season is short and every hour of uptime counts, the last thing you need is an invisible wire crack holding your machine hostage. We understand that. If you’ve been battling intermittent CAN faults that nobody seems able to pin down, let’s talk – not as a sales call, but as one engineer to another.
WhatsApp | Send us a detailed inquiry
