

It wasn’t a faulty ELD unit. The true culprit was your wiring approach. We expose the hidden electrical failures that silently cripple CAN bus networks after installation and detail the OEM-grade hardware installation protocol engineered to prevent them.
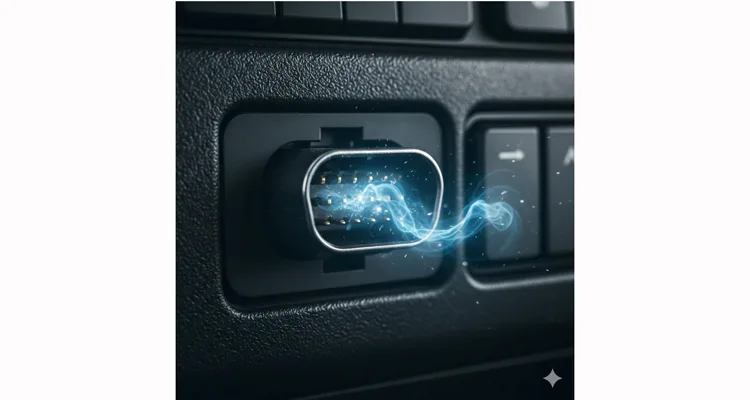
You’ve installed the Electronic Logging Device (ELD). The driver is ready. The fleet manager is waiting. But the truck’s OBD2 diagnostic port is dead. No communication. No data. A cascade of costly vehicle downtime begins. The immediate reaction is to blame a faulty ELD or a “bad port,” but the root cause is often a silent, systemic failure introduced during the hardware installation process. This isn’t just an inconvenience; it’s a critical engineering failure that can paralyze an entire vehicle’s communication network.
Forget generic troubleshooting. We’re dissecting the precise electro-mechanical failure modes that occur when an aftermarket telematics device like an ELD overloads the CAN bus. More importantly, we’ll provide the hardware-level installation protocol—the kind developed for OEM integration—to ensure it never happens. This is not theory; it’s field-proven electrical engineering for reliable vehicle integration.
The Silent Crash: Where and Why Network Failure Happens
The problem rarely appears during bench testing. It manifests in the field, under specific, predictable stressors. You’re not just plugging in a scanner; you’re introducing a new electronic node onto a high-speed, mission-critical network—the vehicle’s Controller Area Network (CAN bus). The most common failure scenario isn’t software. It’s a hardware-induced bus overload.
Real-World Scenario: A 2022 Freightliner Cascadia. The ELD is installed using a common, off-the-shelf pass-through Y-cable. For weeks, it works. Then, during a cold engine start, the ABS warning light stays on. The engine derates. Professional diagnostic tools can’t connect, or they connect intermittently, showing diagnostic trouble codes (“U-codes”) for lost communication with various control modules. The OBD2 port appears to have no power or cannot sustain communication. A technician replaces the gateway module, to no avail. The root cause is upstream: the installation method itself has created a persistent fault condition that the vehicle’s network can no longer tolerate.
Anatomy of a Failure: Not a Bad Port, but a Collapsed Network
Let’s move beyond the symptom (“dead OBD2 port”) to the underlying pathology. The OBD2 port is merely a physical gateway to the vehicle’s communication backbones—primarily the high-speed CAN-C (Chassis) bus and often a link to other networks (e.g., J1939 for heavy-duty trucks). An ELD, in principle, is a passive listener on this network. However, its physical connection can become an active fault injector.
Core Failure Mode 1: The Power Siphon (Pin 16)
The OBD2 port’s Pin 16 (Battery+) is typically fused for 10A, sometimes 15A, but this circuit is shared. It powers not just your ELD, but also feeds other on-board diagnostic circuits, the telematics gateway (if separate), and potentially other modules. A poorly designed ELD adapter cable or an installation setup that adds multiple devices (ELD + GPS tracker + dashcam) can draw 2-3A continuously. This creates a chronic voltage drop at the source.
Why does this matter? CAN bus transceivers are inherently voltage-sensitive. A sustained low system voltage (e.g., 11.5V when the network expects 12.8V) can cause transceivers in peripheral modules to behave erratically—first by failing to communicate, and in severe cases, by dragging the differential CAN-H and CAN-L signal voltages down, effectively “browning out” the entire network segment. The vehicle’s Gateway Module, sensing this corruption, may logically disable the diagnostic port to protect the critical operational networks.
Core Failure Mode 2: The Corrosive Whisper (CAN Bus Pins 6 & 14)
The use of a “vampire tap” or a poorly executed, un-insulated T-tap splice into the CAN bus wires is a guaranteed path to failure. It’s not a question of if, but when.
- Resistance & Signal Integrity Degradation: A cold solder joint or a loose tap connection adds milliohms of parasitic resistance. On a high-speed (500kbps) CAN network, this disrupts the critical bus termination impedance (typically a nominal 120 ohms at each end of the bus). For a deep dive, see our guide on CAN bus 120 ohm readings and missing terminators. The resulting signal reflections cause packet corruption and errors. The network controller responds by increasing error frames, eventually forcing a “bus-off” state. You can explore the detailed mechanics of this fault containment in this external guide on CAN bus error handling and states.
- Short-Circuit Risk: Over time, vehicle vibration and corrosion can turn an exposed splice into a dead short between CAN-H and CAN-L or to chassis ground. This is a common failure analyzed in our forensic guide to wiring harness failures. This instantly collapses the differential signal voltage to zero. The network is electrically dead. The OBD2 port now leads to a non-functional network.
Core Failure Mode 3: The Fuse That Cried Wolf
Even with correct wire gauge selection, using an in-line fuse holder with poor internal spring tension or selecting a fuse rated too high (e.g., using a 10A fuse for a 1A device) introduces significant risk. Vibration can cause micro-arcing within the fuse holder, creating intermittent power cycles—a classic example of the failures we document in our guide to diagnosing intermittent CAN bus faults. Each cycle forces a hard reset on the ELD, which can cause a high in-rush current spike as its internal capacitors recharge. This repeated spike is electrical noise on the power line, detectable by sensitive vehicle modules, and can lead to premature fatigue of the vehicle’s own factory fuse.
The Engineer’s Installation Protocol: A Step-by-Step Guide to Zero-Fault Integration
This is the standard procedure we mandate for our own OEM integration projects and fleet telematics deployments. It assumes you have a digital multimeter and basic hand tools.
Phase 1: Establish the Baseline – Interrogate the Port
- Measure Baseline System Voltage: With the vehicle ignition OFF, measure voltage between OBD2 Pin 16 (Battery+) and Pin 4 (Chassis Ground). Record the value (e.g., 12.4V). Start the engine, measure again (should read ~13.8-14.4V). This confirms the source power circuit is healthy.
- Check CAN Bus Termination Integrity: With the ignition OFF and all aftermarket devices disconnected, measure the resistance between Pins 6 (CAN-High) and 14 (CAN-Low) at the OBD2 connector. You should read approximately 60 ohms (two 120-ohm termination resistors in parallel on a correctly terminated bus). A reading of 120 ohms indicates one terminator is missing. A reading of 40 ohms or less suggests an unauthorized parallel device is already loading the bus. For a full diagnostic walkthrough, refer to our CAN Bus Health Check with a Multimeter. Document this finding.
Phase 2: Choose Your Weapon – The Adapter or The Scalpel
- Abandon Pass-Through Cables. Opt for a dedicated, isolated OBD2 telematics adapter. A high-quality adapter must feature an integrated fuse on the power line, a built-in galvanically isolated CAN transceiver (opto-isolated or capacitive isolation is non-negotiable), and high-quality gold-plated contacts with molded strain relief.
- If Hardwiring is Unavoidable:
- Power Source: Do NOT tap from the OBD2 port’s Pin 16. Locate a dedicated, switched ignition source in the vehicle’s fuse panel (e.g., “ECU Ign” or “Radio Ign”) using a circuit tester. Verify it cycles with the key.
- CAN Bus Tap Point: If a direct tap is necessary, perform it at the gateway module connector or a known factory junction, never at the OBD2 port itself.
- Splicing Method: Use sealed, solder-splice connectors (heat shrink tubing with integral solder ring). Strip, insert, apply heat. The solder flows, creating a gas-tight, vibration-proof connection. This method’s superiority in high-vibration environments is detailed in our analysis of Crimp vs. Solder for Vibration Reliability. Follow with a layer of professional-grade abrasion-resistant tape (e.g., Tesa 51036). The use of “vampire taps” is prohibited.
Phase 3: Govern the Flow – Fuses and Gauge as Law
- Calculate Actual Device Draw: Measure the ELD’s actual current draw with a multimeter in series during normal operation. Apply a 50% safety margin to this value.
- Fuse Selection Logic: Install an ATC/ATO blade fuse as close to the power tap source as possible. Select the smallest standard rating above your calculated draw (e.g., a 2A device requires a 3A or 5A fuse, not 10A).
- Wire Gauge Specification: For wire runs under 2 meters and continuous draws under 3A, 18 AWG wire is the minimum acceptable gauge. For longer runs or higher current draws, 16 AWG must be used. This minimizes resistive voltage drop.
Phase 4: Sign Your Work – The Post-Installation Validation Ritual
- Re-measure Voltage at Load: At the ELD’s own power input terminals, measure voltage with the engine running. It should be within 0.3V of your baseline measurement taken at the battery. A larger drop indicates undersized wiring or a high-resistance connection.
- Re-check Bus Resistance: With the ELD connected and powered, re-measure the resistance between Pins 6 and 14 at the OBD2 port. The change from your baseline (Phase 1) should be minimal (a few ohms). A drastic change indicates the ELD lacks proper isolation and is electrically loading the CAN bus.
Five Installation Sins That Guarantee a Costly Callback
- Treating the diagnostic port like a power strip (Piggybacking on Pin 16).
- Trusting a vampire tap in a vibration-filled environment.
- Installing a 10A fuse on a 1A circuit and calling it protection.
- Ignoring the physics of voltage drop over thin, undersized wires.
- Flying blind – conducting no before or after electrical measurements.
How to Confirm You’ve Fixed It (And It Stays Fixed)
True success isn’t just “the ELD powers on.” It’s about long-term network stability under real-world stress.
- Diagnostic Tool Communion Test: Connect a professional-grade diagnostic scan tool (e.g., JPRO, NEXIQ, or a high-end Autel system). Command active tests on various modules (e.g., cycle an ABS solenoid). The ability to do this without communication drops or U-codes confirms network health.
- Oscilloscope Signal Check (Gold Standard): Probe the CAN-H and CAN-L signals at the OBD2 port. A healthy bus displays clean, mirror-image square waves with a steady 2.5V baseline and a 2V peak-to-peak differential. Signal noise, rounding, or reduced amplitude indicates unresolved issues.
- Long-Term Data Logging: Monitor the ELD’s own internal diagnostic logs for “CRC errors” or “bus-off” events. A proper installation will show zero bus errors over weeks of operation.
Related Hardware Solutions & Engineering Support
The installation protocol detailed above isn’t theoretical. It’s physically embodied in the isolated adapters and custom harnesses we engineer. When we specify 16 AWG wire or a 500V optical isolator, it’s not from a generic catalog; it’s a direct result of the IATF 16949-governed design process we use to preempt the very failures we’ve dissected. Our commitment to systemic quality extends to environmental management, certified under ISO 14001.
- Isolated J1939/J1708 to OBD2 Adapters: For heavy-duty vehicle fleets where direct J1939 data bus access provides a cleaner, more robust signal than the passenger-car-style OBD2 port. Understand the protocol differences in our J1708 vs. J1939 comparison.
- OEM-Custom Telematics Harnesses: We design and manufacture complete, vehicle-specific wiring harnesses for telematics units, encompassing the CAN bus tap point, power distribution, fusing, correct gauge, and environmental seals, delivered as a ready-to-install retrofit kit. Discover the true value in our analysis of the Custom Cable True Cost.
- Engineering Consultation Services: The steps above are the universal standard. Your specific fleet architecture (e.g., Navistar vehicles with multiplexed modules, or a new Battery Electric Vehicle (BEV) with multiple CAN FD networks) may demand a tailored schematic analysis and custom harness design.
We don’t just supply components; we provide the engineered connective tissue that prevents your ELD from becoming a network liability. Our direct factory control, 20+ years of automotive harness manufacturing expertise, and 4-step quality inspection regimen for every custom harness form the unshakeable foundation of our solutions. This is how we guarantee performance beyond basic vibration standards.
FAQ: Direct Engineering Answers to Your Installation Concerns
Q1: My ELD works in some trucks but not others. Same model. Why?
A: Vehicle build variations (sometimes called “running changes”). The “same” truck model may have a different telematics gateway supplier or a minor factory wiring revision. One unit may have more optional modules on the same CAN bus branch, bringing it closer to its inherent electrical load limit. A suboptimal installation becomes the final straw that pushes it over the edge. This is why the Pre-Installation Health Check (Phase 1) is non-negotiable. For more on troubleshooting no-communication issues, see our fleet manager’s guide.
Q2: Can a bad ELD unit itself permanently damage the vehicle’s OBD2 port or gateway?
A: Absolutely. An internal short in the ELD’s power supply or a failed CAN transceiver can directly short-circuit the bus lines or power lines. This is precisely why installing a quality, isolated device and employing a properly fused, dedicated circuit is critical—it contains any potential failure to the ELD itself, protecting the far more expensive vehicle electronics.
Q3: What’s the one essential tool I should buy to diagnose and avoid these problems?
A: A reliable digital multimeter with Min/Max recording capability. The ability to capture a transient voltage drop under load or a momentary short circuit is invaluable. For these installation fault diagnostics, it is often more immediately useful than an expensive scan tool. Learn more in our CAN Bus Multimeter Fault Tracing Guide.
Q4: Is it ever safe to use an OBD2 splitter cable for multiple devices?
A: Generally, no. Most common splitters simply parallel all pins, compounding power overload and bus loading issues. If multiple devices are mandatory, the only safe approach is to use an active, powered splitter with individual isolated channels for each device—a specialized, engineered component. We detail the inherent problems here.
Q5: Your method seems thorough but time-consuming for a large fleet rollout. Is the trade-off worth it?
A: The critical trade-off is between time invested once in a correct, reliable installation versus time (and money) spent repeatedly on service callbacks, complex diagnostics, and preventable vehicle downtime. Implementing a fleet-wide standardized protocol based on these principles, supported by pre-made custom harnesses, is ultimately the most efficient and reliable long-term path.
Q6: Do you provide pre-engineered harness solutions for specific ELD and vehicle combinations?
A: Yes, this is a core service. As an OEM supplier, deep customization is our specialty. We produce plug-and-play harness assemblies for specific ELD-to-vehicle applications, including your required connector types, exact wire lengths, custom labeling, and branding. This eliminates unreliable field splicing entirely.
Q7: We are an ELD manufacturer. Can you help us design a more robust connection interface for our product?
A: This is our exact expertise. We partner with telematics device manufacturers to design the optimal external wiring harness and connector specification for their units. We ensure the interface meets stringent electromagnetic compatibility (EMC) standards (see our EMI shielding field guide), provides robust power and signal integrity, and simplifies error-proof field installation for your end customers.
Tired of Chasing Ghosts in the Machine?
If you are managing a large-scale ELD rollout, battling persistent CAN bus communication dropouts, or designing the next generation of vehicle telematics hardware, the industry’s “standard” wiring approach is your biggest operational risk.
You need a partner who understands vehicle network systems at the fundamental electrical and physical layer, not just the software protocol.
Let’s engineer a permanent, reliable solution.
- Detail your specific integration challenge via our contact page. Provide the vehicle models, ELD units, and the specific problems you’re facing.
- For a direct, technical conversation with our senior engineering team, reach out on WhatsApp. Send us photos of your current installation, wiring diagrams, or error logs. We will provide a concrete, actionable analysis.
We specialize in OEM-level customization, harness design, and direct engineering support to move beyond makeshift fixes to permanent, reliable vehicle integration.
